Smart STB is a MAC-based application that emulates a MAG set-top box, giving you a full portal-style IPTV experience directly on your television. It runs on Samsung Smart TVs (Tizen OS), LG Smart TVs (webOS), Android TV devices, and Android phones and tablets, no extra hardware required.
What makes the activation different from most IPTV apps is that it happens in two separate places. The app itself has to be licensed on the Smart STB website, and your subscription has to be authorised on your provider’s server. Each uses a different MAC address, and confusing the two is the single most common reason a setup fails.
The app comes with a 7-day free trial. Once that ends, you buy a licence through the site’s billing system, monthly, yearly or lifetime.
One thing to be clear about from the start: Smart STB includes no channels of its own. You need an active IPTV subscription, and your provider must support Stalker portal / MAG connections.
Supported devices
- Samsung Smart TVs (Tizen OS)
- LG Smart TVs (webOS)
- Android TV devices
- Android smartphones and tablets
Step 1 — Install the app and note both MAC addresses
Everything that follows depends on getting these two values right, so start here and write them down before doing anything else.
Open the app store on your TV and install Smart STB.
Launch the app.
Open Device Info.
Note the Software MAC, this activates the app on the Smart STB website.
Note the Virtual MAC, this activates your service on your provider’s server.
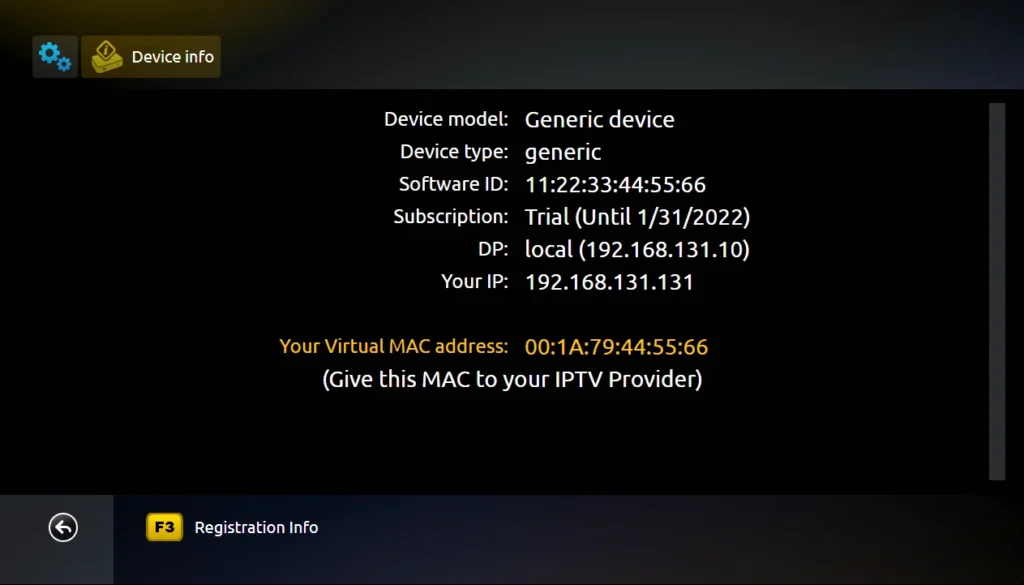
Two addresses, two entirely different purposes. The Software MAC goes to Smart STB in Step 2; the Virtual MAC goes to your IPTV provider in Step 4.
Swapping them is the classic mistake, and the resulting error messages rarely point at the real cause, so copy each one carefully and label your notes clearly.
Step 2 — Start the 7-day free trial
The trial is ordered from the Smart STB website rather than from within the app, so you’ll need a phone or computer for this step.
On a computer or phone, go to smart-stb.net and open the trial order page.
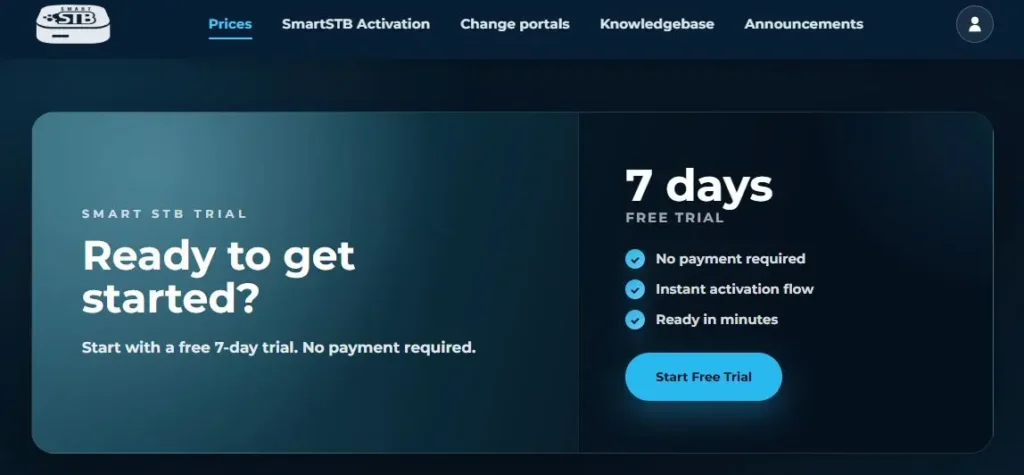
Enter your Software MAC address.
Enter your Stalker portal address.
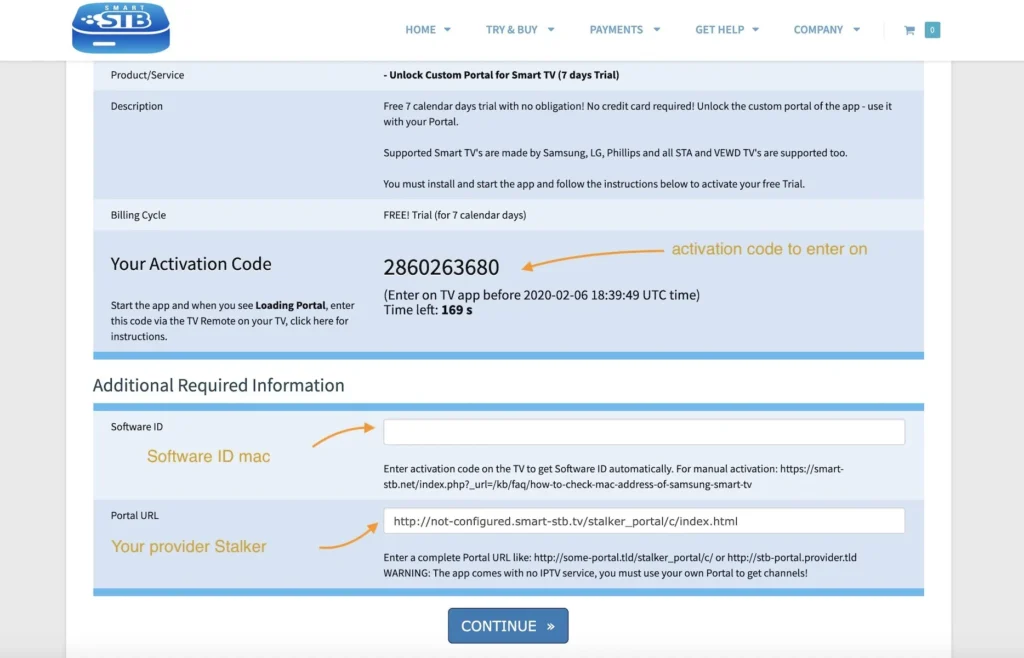
Proceed to checkout.
You’ll need your portal URL ready at this point, it’s supplied by your IPTV provider. If you don’t have it yet, see the FAQ below before starting the order.
Step 3 — Create an account and activate
The trial costs nothing, but it still runs through the site’s normal ordering process, which means an account is required.
Create an account on the Smart STB site if you don’t already have one.
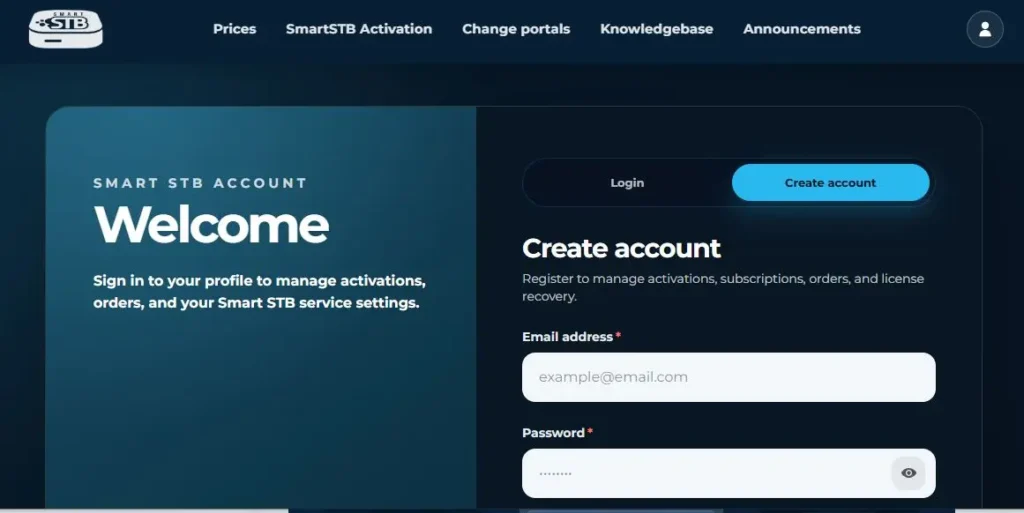
Sign in.
Complete the zero-cost order to start the trial.
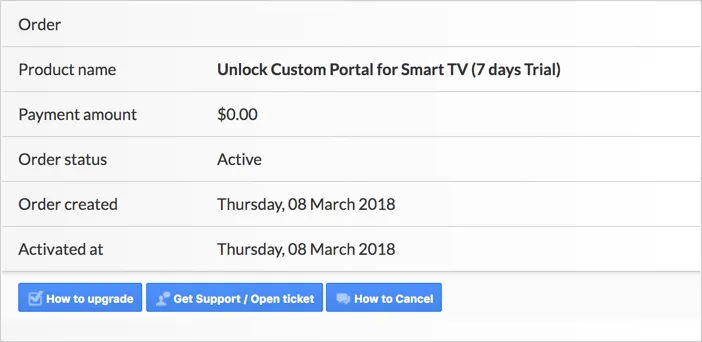
Check that Order Status reads Active.
Don’t skip that last check. Until the status shows Active, the app licence isn’t live and nothing will load, no matter how correct your portal settings are. If it’s still pending, wait a moment and refresh before troubleshooting anything else.
Step 4 — Authorise your provider
With the app licensed, the second half of the activation happens on your provider’s side.
Go back to the Device Info page in the app and take your Virtual MAC.
Add it to your line through your provider’s dashboard, if they offer one.
If there’s no dashboard option, send the address to your provider and ask them to register it.
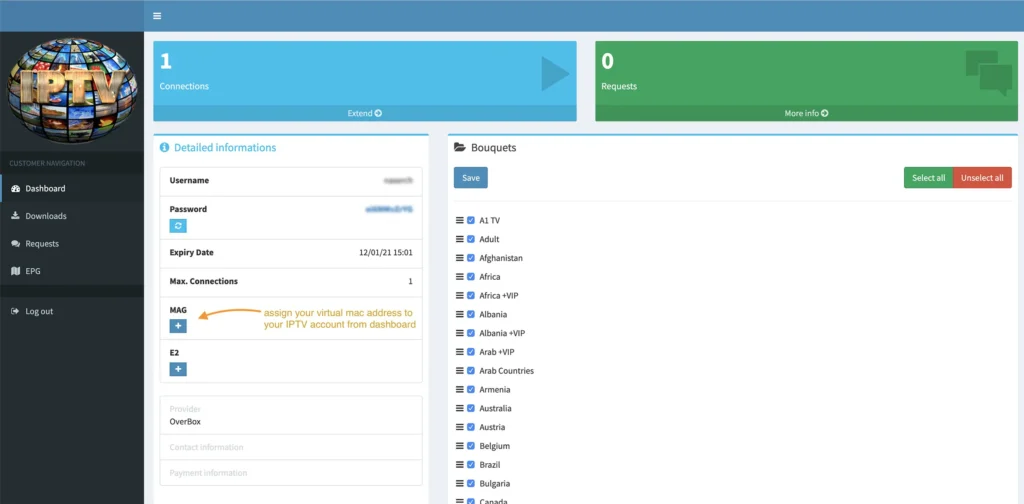
Wait for confirmation that the device has been authorised.
Note that this is the Virtual MAC, not the Software MAC used in Step 2. Once your provider has registered it, your channels and VOD load through the portal automatically, there’s no import or refresh to trigger inside the app.
Activating a paid licence
When the 7-day trial expires, the app stops working until a licence is purchased. This is handled in the same billing system you used for the trial.
- Open the Smart STB billing client area.
- Go to Services.
- Select Order New Service.
- Choose a monthly or yearly licence, or a lifetime plan.
- Complete the payment.
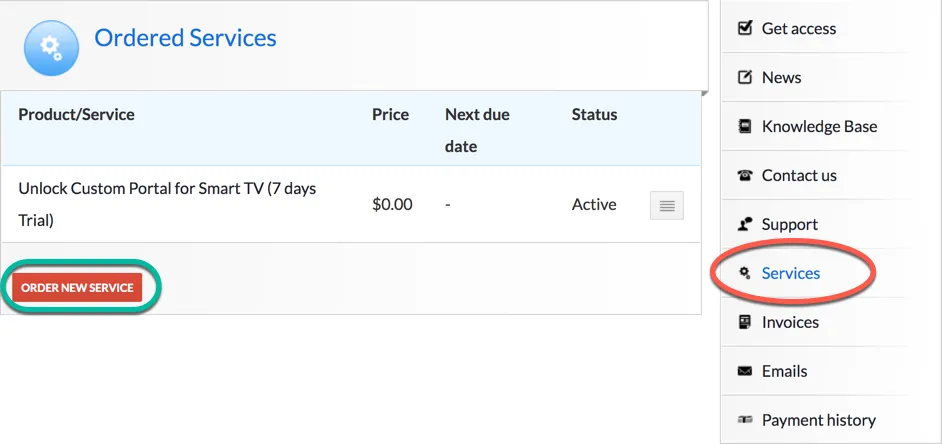
Lifetime plans show a status of Paid with an expiry date of Never, so you can confirm at a glance that nothing further is due. The lifetime licence also unlocks the Custom Portal option, which monthly licences don’t include.
Conclusion
Activating Smart STB is straightforward once you understand that it’s two activations, not one. The Software MAC licenses the app with Smart STB; the Virtual MAC authorises your subscription with your provider. Get those two the right way round and the rest is a matter of entering a portal URL and waiting a moment for the channels to appear.
The 7-day trial is genuinely useful here, it lets you confirm your provider actually supports Stalker portal connections before spending anything on a licence. If the channels load during the trial, they’ll load afterwards.
Keep both MAC addresses, your portal URL and your Smart STB account details somewhere safe. You’ll need them again after a factory reset, a TV software update, or if you ever switch providers.
Frequently Asked Questions
Which MAC address do I give my IPTV provider?
The Virtual MAC, found on the Device Info page in the app. The Software MAC is only for licensing the app on the Smart STB website. Most providers offer a dashboard where you can register the address yourself; if you can’t find the option, contact them directly.
Where do I find my Stalker portal address?
Check your IPTV provider’s dashboard first. If it isn’t listed there, you can usually derive it from your M3U link by adding /c to the end of the link’s domain — a method that works with roughly 90% of providers. If neither works, ask your provider.
Why aren’t my channels loading?
Work through it in order: confirm the Smart STB order status reads Active, confirm your provider has registered your Virtual MAC, then check the portal URL character by character. In most cases it’s the MAC registration rather than the URL.
What happens when the free trial ends?
The app stops working until you purchase a licence. Go to the billing client area, open Services, then Order New Service to choose a monthly, yearly or lifetime plan. Your settings aren’t lost in the meantime.
Is the lifetime licence worth it over monthly?
It pays for itself over time and shows an expiry of Never, plus it unlocks the Custom Portal feature. That said, buy it only once you’ve confirmed your provider works with Smart STB during the trial.
Does Smart STB work on my TV?
It supports Samsung TVs running Tizen OS, LG TVs running webOS, Android TV devices, and Android phones and tablets. If your set isn’t on that list, alternative apps exist for most platforms.
Do I need a separate licence for each TV?
Yes. The licence is tied to the Software MAC, which is unique per device. A second television means a second licence and a second Virtual MAC registration with your provider.