To watch IPTV on a Mac, you install an IPTV player app, add your M3U link or Xtream Codes, and let your channels load, or you simply open your playlist in VLC. A Mac handles IPTV smoothly because it has plenty of power and a large, sharp screen, and the setup takes only a few minutes with no technical skills required.
While a Mac does not come with a built-in IPTV app, there are several reliable players available, and the free VLC media player can play your channels just as easily. Once it is set up, you can watch live channels, sports, movies, and on-demand content right from your desktop or laptop, and even send the picture to a bigger screen if you wish.
With a reliable IPTV Canada provider that gives you clear login details and stable servers, getting started is straightforward and quick. This step-by-step guide walks you through both methods from start to finish, including how to organize your channels, add a program guide, improve the picture, and fix the most common issues.
Step 1: Choose how to watch IPTV on Mac
There are two simple ways to watch IPTV on a Mac, so pick the one that suits you. The first is a dedicated IPTV player app, which gives you a proper channel list and program guide. The second is VLC, a free media player that can open your playlist directly, which is handy if you want the simplest possible setup.
A dedicated IPTV app offers categories, favourites, and a guide.
VLC is the quickest option for basic live viewing.
Both work on any modern Mac.
This guide covers the app method first, then VLC.
Step 2: Check what you need before you start
Before you begin, make sure you have the few things required for a smooth setup. You need your Mac, a stable internet connection, and an active IPTV subscription. Having your details ready first keeps the process quick.
- A Mac running a recent version of macOS.
- A stable internet connection, ideally wired.
- An active IPTV subscription with an M3U link or Xtream Codes.
- A little free space to install an app.
Step 3: Get your IPTV details from your provider
Your provider gives you the details that connect your app to the service. Usually this is an M3U playlist link or Xtream Codes, sometimes with a program guide link. Keep these handy and free of typing errors, since they load your channels.
- An M3U link, or Xtream Codes (URL, username, password).
- A program guide (EPG) link, if one is provided.
- Your account login details, stored somewhere safe.
- New to IPTV? See our beginner’s guide to setting up IPTV.
Step 4: Install an IPTV app on your Mac
Next, install a dedicated IPTV player from a trusted source. The Mac App Store is the safest place to find one, and some apps are also offered on the developer’s official website. Sticking to trusted sources protects your Mac while you set things up.
You can install an IPTV player either by searching for it in the Mac App Store, or by downloading it from the official IPTV Smarters Pro website.”
Choose MacOS APP.
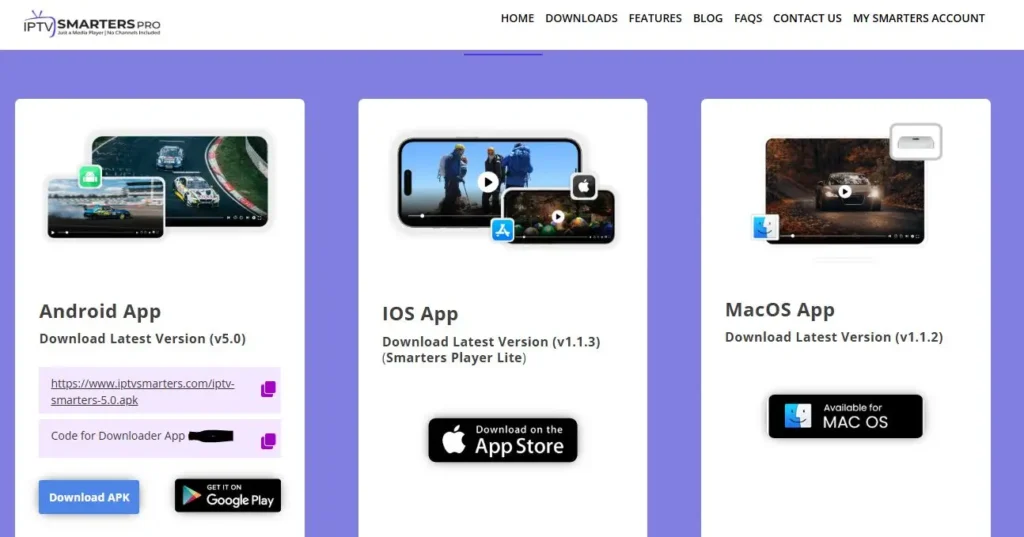
Download it and wait for the installation to complete.

Step 5: Open the app and add your playlist
With the app installed, you connect it to your subscription. Open the app and choose to add a playlist or log in, then enter the details from your provider. Once accepted, the app loads your channels.
Open the IPTV app on your Mac.
Choose to add a playlist or log in.

Paste your M3U link, or enter your Xtream Codes.

Confirm and wait for the channels to load.
Step 6: Load and organize your channels
Once connected, the app pulls in your channel list. A little organization makes browsing much easier, so take a moment to sort everything. A few settings are all it takes.
Wait for the channel list to finish loading.
Sort channels into categories like sports, movies, and kids.
Create a favourites list for quick access.
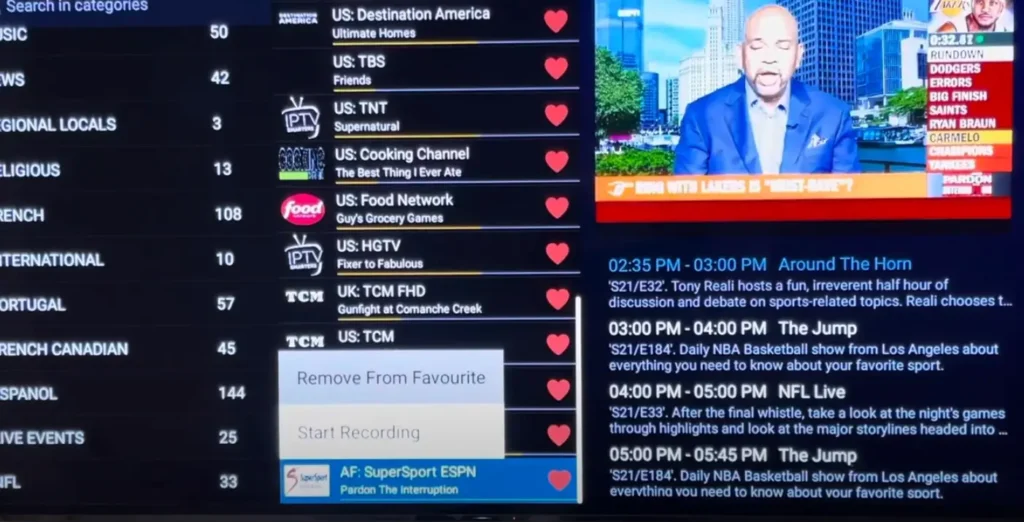
Hide categories you never watch.
Step 7: Set up the program guide (EPG)
A program guide turns a plain list into a proper TV experience. If your app supports it, add your guide link so it can show what is on and when. The app then matches the guide to your channels.
Open the app’s guide or EPG settings.
Enter the program guide (EPG) link from your provider.
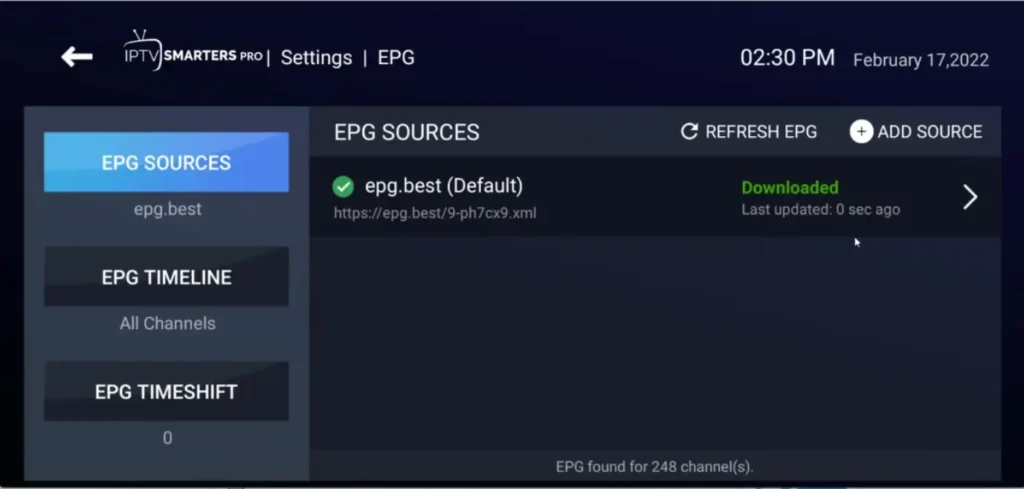
Let the guide load and match your channels.
If channels look mismatched, recheck the guide link or matching.
Step 8: Alternative method, watch with VLC
If you prefer the simplest route, VLC can play your IPTV playlist without a dedicated app. VLC is a free, trusted media player that opens an M3U link directly, though it does not offer categories or a polished guide. It is a great quick option or a backup.
Download and install VLC from its official website.
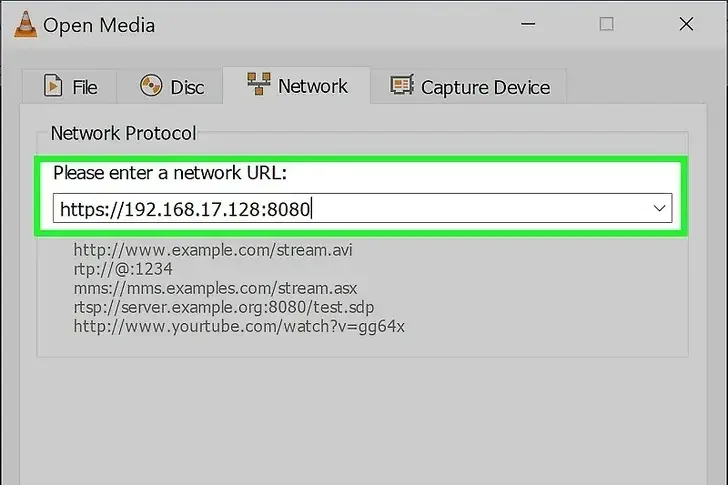
Open VLC, then choose Media and Open Network.
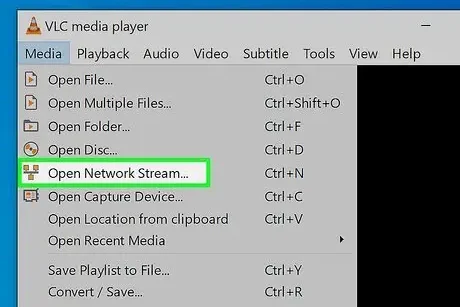
Paste your M3U link and press Open.
Use the playlist panel to browse channels.

Step 9: Optimize playback and the connection
For the smoothest picture, your connection matters more than anything else. A wired connection is the most stable choice, especially during busy evening hours when networks are under strain. A few small adjustments keep playback clean.
- Use a wired Ethernet connection where possible.
- On Wi-Fi, sit close to the router and use the 5 GHz band.
- Avoid heavy downloads on other devices while watching.
- Raise the buffer in the app settings if the picture stutters.
Step 10: Troubleshoot common problems
Most issues have quick fixes, so a short checklist usually solves them. Buffering points to the connection, missing channels point to the playlist, and an empty guide points to the EPG. Working through these in order clears up the majority of problems.
- For buffering, check your speed and switch to a wired connection.
- If channels are missing, recheck your M3U link or login.
- If the guide is empty, confirm your EPG link is correct.
- Keep the app and macOS updated, then restart if needed.
Frequently asked questions (FAQ)
Can I watch IPTV directly on a Mac?
Yes. You can install a dedicated IPTV player app from the Mac App Store, or open your playlist in VLC. Both let you watch live channels on your Mac in minutes.
What is the easiest way to watch IPTV on Mac?
VLC is usually the easiest, since it opens your M3U link directly without extra setup. A dedicated app takes a little more setup but adds categories and a program guide.
Do I need to pay for an IPTV app on Mac?
Many IPTV apps and VLC are free to download, though some offer paid versions with extra features. The app is always separate from your subscription.
What details do I need from my provider?
You need an M3U link or Xtream Codes, and ideally a program guide (EPG) link. These are entered into your app or VLC to load your channels.
Why does IPTV buffer on my Mac?
Buffering usually comes from the connection. A wired connection, a closer router, and avoiding other heavy downloads will normally smooth playback.
Can I use a web browser instead of an app?
Yes, if your provider offers a web player, you can open it in your Mac’s browser. A dedicated app or VLC, however, usually gives a more stable experience.
Is watching IPTV on Mac legal?
IPTV technology is legal; what matters is that your provider holds the proper rights to the content it distributes. Choosing a legitimate, transparent provider keeps you on the right side.
Conclusion
Watching IPTV on a Mac is simple once you know your two options: install a dedicated IPTV app and add your login details for the full experience, or open your playlist in VLC for the quickest possible setup.
A dedicated app is the better choice if you want categories, favourites, and a program guide, while VLC is ideal when you just want to start watching with minimal fuss. From there, organizing your channels, adding a guide, and using a stable connection give you a clean, reliable experience every time you sit down to watch.
Remember to keep your app and macOS updated, download only from trusted sources, and pick a legitimate provider that holds the proper rights to its content. These small habits protect both your Mac and your viewing quality over the long run. With everything in place, your Mac turns into a full live-TV experience in just a few minutes, ready whenever you are.